This tutorial will provide an overview of basic actions. It uses the 'Automatic by Size' layout. This layout places images based on their size.
Open Pics Print.
- Close tip windows, start up screens, options and all other popup windows until
only the main window is open.
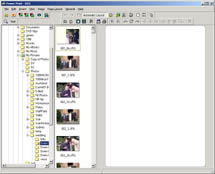
The application should look like this:
- Change layout to Automatic
Layout by Size. To do this, from the 'Page Layout' menu select 'Automatic
Layout' and then 'Default Size'.
This will automatically arrange images on the page based on their size. - Add an image. From the 'Insert' Menu choose 'Add image from file'.
Locate an image that you are proud of, and select it.
The image will appear in the preview pane at the default size. - Change the image size to 4 x 6 inches (100 x 150 mm). To do this, from the 'Items' menu, select 'Fit to Size' and then the appropriate size (wording will differ depending on the measurement units selected).
- If necessary, rotate the image. From the 'Items' menu, select one of the rotation commands.
- Insert another image using the 'Add image from file' command on the 'Items' menu.
- Select the image. It should have a border with black resize handles. If it does not, select the image by left clicking on it.
- Make the image a bit smaller. To do this, click on the bottom right resize handle and drag it up and to the left. When you release the left button, the image will resize. Try and reduce the image to about 3 x 4 inches (75mm x 100mm).
- The image is still the wrong size, so resize it to 3 x 4. To do this, right click on the image and select 'Fit to Size' followed by the appropriate size (wording will differ depending on the measurement units selected).
- That image is never going to be the right size and you didn't like it anyway. Delete it! From the 'Items' menu, select 'Remove'
- Print the image. From the file menu, select the 'Print' command (if you didn't like the image that much, then hit cancel).
- Save the file for future posterity. From the 'File' menu, select the 'Save' command.